Monday, May 28, 2012

Woodworking 101

We have a great fire pit in our front yard…and since 2005 I think we’ve used it less than a dozen times. When it starts to get warm enough to sit outside in the evenings it’s getting too dry to have a fire, even in a pit it makes me a little nervous…it only takes a spark.  So in the heat of summer when we have gatherings we’re all crammed on the deck trying to find shade under one umbrella.  
I’ve wanted to create a space somewhere in or very near my garden with seating and a table for a while-what’s better than eating dinner in the same place you grew your food!  Since my garden is mostly terraced I was stumped.  But then, aha!  It came to me.  Why not build a round table that fits exactly over the fire pit and put an umbrella in the center for shade?  If we want to have a fire you simply have to lift off the table.  So first step was the table…I headed out to the  “surplus” lumber/metal/car parts/tractor pile on our property and find some leftover deck wood.  My husband helped me by showing me how to use the air gun and jigsaw to round it off…once that was done I then need to find the perfect chair…it had to sit on gravel without sinking into the dirt/mud, so no small spindly legs.  An adirondack chair fit the bill…but the ready made ones just didn’t feel sturdy enough or quite big enough and the really nice ones were $200+ each…and I wanted something with a little more modern look, something unique.  
Then I remembered my super stylish friend Cheri had built some chairs for their lake cabin out of some old,  reclaimed semi burnt wood. (Well, actually her husband built them and she was assistant)  I was really close to just hiring him to make me a set of 4 but then she directed me to a website with a detailed pattern and cut list…so I decided I wanted to try to make them.  I’ve never built anything myself so I knew I would need my husband to be my woodworking professor…I learned how to run the rip saw, table saw, clamps, importance of pre-drilling, etc.  It was a lot of work but once we got through one chair it went pretty fast.  All in all in took us probably 15 hrs to build all 4 and $130 in wood.  I used pine and I’m only plannning to oil them with linseed or tung oil and just let them age/grey. I debated about painting them but I absolutely hate painting!  and to paint these it would take several days, 2-3 coats with sanding in between plus a top coat of polyurethane.  No thanks!  Of course cedar or teak or another harder wood would have been a better choice but since this was my first attempt at making furniture I wanted to keep the wood costs low.  
I’ve got a bit of leftover wood because of the changes we made so looks like I can build some bird condos!  Maybe one day when you go out for a nice drive in the country you’ll see a sign on the side of the road selling custom Adirondack chairs, by Jill.  
An antique Dewalt rip saw from the 70’s that was given to us.  The owner had passed away but all the original
manuals and attachments are still in the drawers…kinda cool.  
First mistake…I precut all the wood according to directions.  Once we put the first chair
together we decided to take “creative license” and do some design changes.  I wanted a
really wide arm to easily accommodate a beverage or plate.  I decided to change the lay
out of the backs too. 
Day one...First chair almost complete.
Memorial Day BBQ lunch with friends.
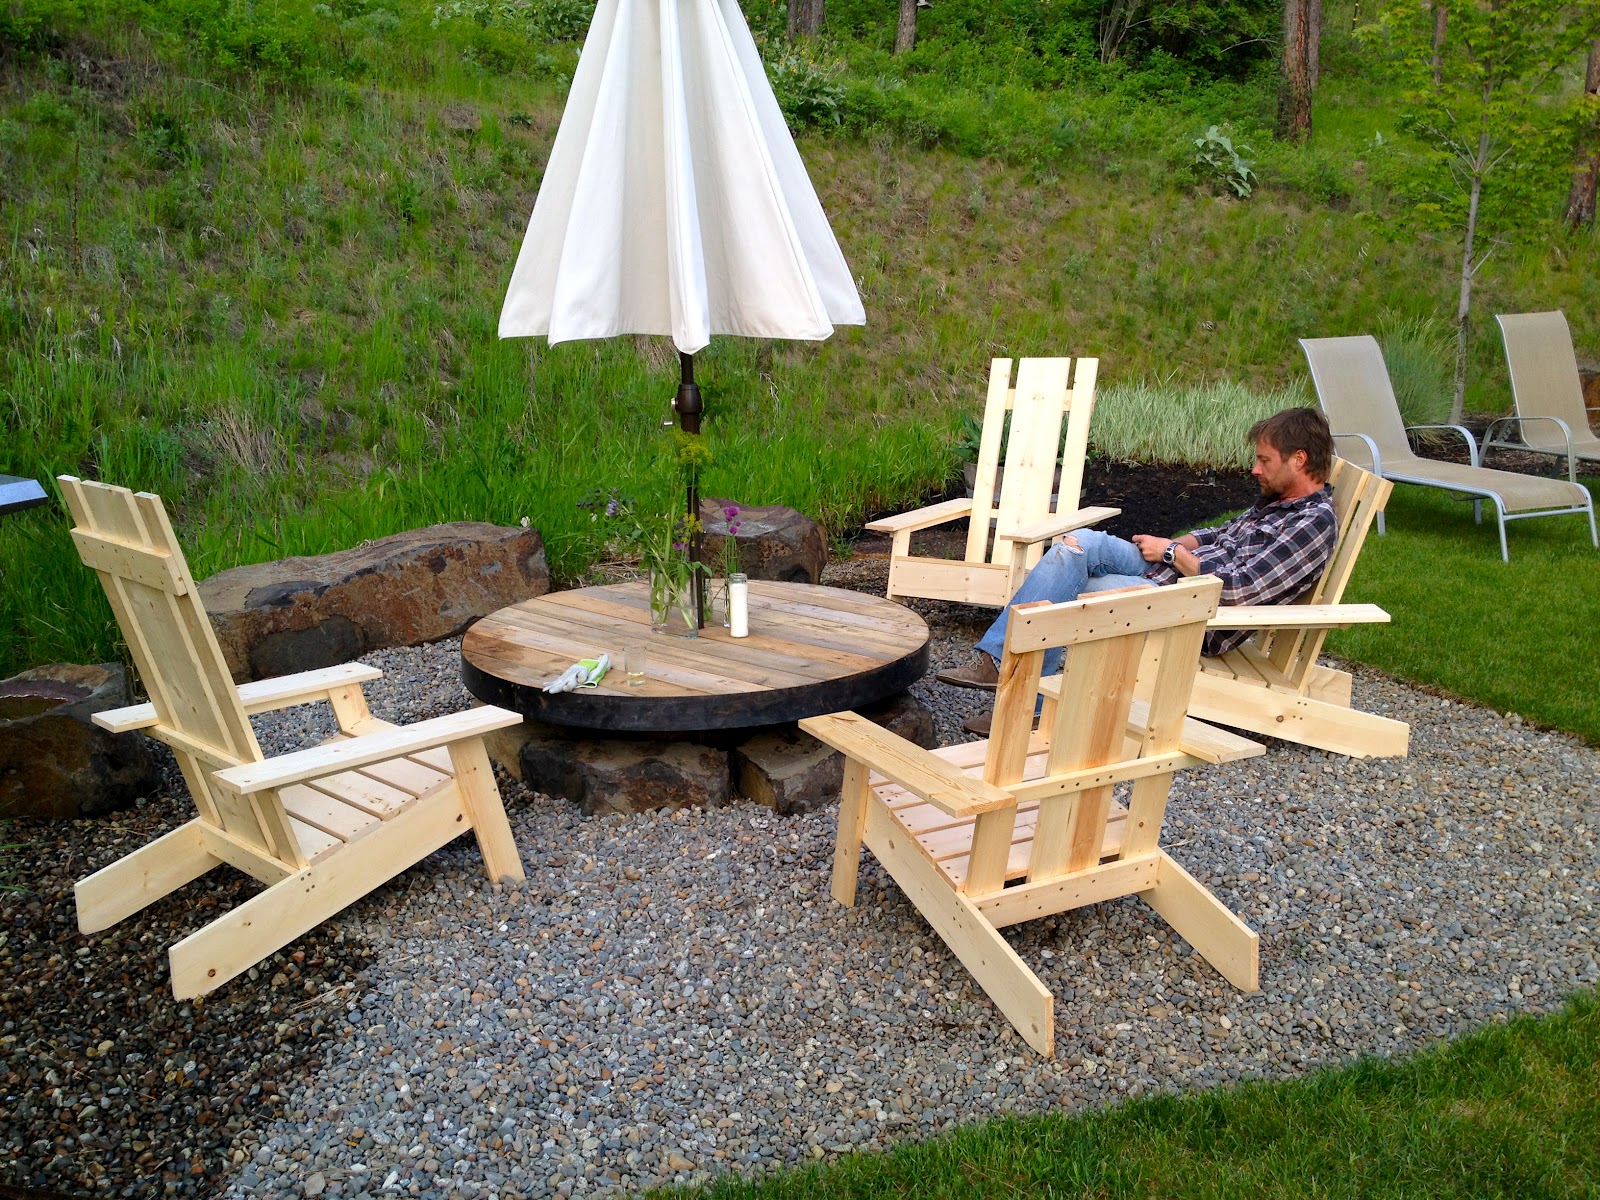
I decided to make 2 different styles…one low back one high back.  Professor Murdoch taking a break.

After we put the table in my husband came up with a brilliant idea of using leftover steel
lawn edging to wrap around the table to give it a modern/industrial look.  It will soon
rust giving it that “Corten” steel look. 
Installation of fire pit area in 2006.
2006.
2012

UPDATE:  I decided I should treat the chairs with some sort of oil based stain to protect them and make them last longer.  Even after a week the wood was starting to crack from rain and sun exposure.  I  used a semi-transparant oil based deck/outdoor furniture stain from Ace Hardware.  I picked a color that most resembled “grey” wood.  The whole process was pretty easy….it took about one hour per chair.  I put down a drop cloth in the garage, flipped the chairs over and slopped on the stain.  I decided to keep the coat very light so after I completed a section I wiped it off with a lint free rag.  (the stain wasn’t drying quickly on this day so I could do quite a lot before I went back and wiped it off)  This way I didn’t have to worry about keeping a wet edge or even brush marks.  Once I completed the entire chair I went back and added a solid coat to just the top side of the arms.  I figured the arms are going to get the most wear and tear from water and sun since they’re completely flat.  So right now the arms are a bit darker than the rest, I may keep it like that or I may add a thicker coat to the tops of the seat and back.
Once it stops raining I can move them back to the fire pit.

One of two snakes that were sunning themselves on our
driveway while i was painting.  Fortunately they’re not
rattlesnakes.

Monday, May 14, 2012

Style, Inspiration and Frogs

I used to go antique shopping quit a bit when we lived in a bungalow cottage on the south hill, but not as much since moving to a more “modern” home.  I definitely suffer from shoppers anxiety when faced with too many options…I mean there are things in my basement now that I have no idea why I bought??
While we were building our new home in 2005 I still didn’t really have a clear vision of my “style”. When I would look through magazines or books or go shopping it seemed like I liked everything, but did I really?  I would find myself getting so overwhelmed and stressed out that I would not buy anything at all or buy something that really wasn’t me. 
A few months after we moved in we had some good friends visit from Vancouver, BC.  Carrie McCarthy is the wife of my husband’s long time friend from way back…and she is an interior designer. So in my dream world I was hoping she would walk in the door and just TELL me what she would do and give me some ideas…well I got something even better,  I got a Style Statement.  Carrie McCarthy is the woman behind this amazing concept and idea.  At that time she was working on getting her website and  book launched and they were “giving" Style Statements to lots of friends and family.  So what is a Style Statement?  Well, to quote from her website..."your style statement helps you make choices that accurately reflect and support the real You.  It’s two profoundly and magical words that guide your personal style-from your wisdom to your wardrobe, from your longings to your living room-your Style Statement is where your essence meets your expression. When applied, it becomes a lifelong mantra, allowing you to make authentic choices that make you feel powerful and joyful.”  
After about an hour interview she presented me with my two magical words and she explained to me why those two words were unique to me.  It was amazing!  It made total sense and even in that moment I felt like I had a clearer vision of the real me.  Pretty cool.  
If you feel like your life is a little out of sync or you’re looking for a career change or you have a hard time making clear decisions or you have a closet full of clothes you don’t wear…check out her website and maybe getting a Style Statement will change your life!
So now when I go into an antique store or furniture store, which can be so overwhelming, I can focus on stuff that is truly my style instead of getting overwhelmed…recently I bought an old galvanized laundry sink at Roost. Why?  Well, I knew I liked it and I love the patina of old galvanized steel.  I wasn’t sure what I would use it for, maybe use as a large ice bucket for beer and wine at summer parties, maybe turn it into a planter in the yard somewhere, maybe do it like they did in the old days and wash clothes in it (not!).  
While surfing the internet for inspiration these last few months I ran across an amazing gardening website.  Her name is Margaret Roach (maybe some of you have heard of her) and she lives in upstate NY, which coincidently is the same planting zone as Spokane, 5B.  She used to work for Martha Stewart but soon after 9-11 she decided to move permanently upstate and now is a freelance writer and book author and master gardener.  Definitely take a look at her site, A Way to Garden,  she has a wealth of information and is so inspiring to me!  In one of her posts she tells how to set up an instant, seasonal water garden that requires little effort with maximum results, my kind of project!  And now I have a use for my sink, at least for the summer since this is seasonal.  She goes into more detail here and the “comments” section is very informative as well.  We always seem to have a few little frogs gathered around the front porch and now I will have a little home for them!  

BEFORE:  I’m testing out the sink first while I wait for
my floating plants to arrive in the mail, no leaks!
 I added an old branch so the
 frogs will have something to hang
out on.  I’m going to use the small terra-cotta pot
as well and add shade plants to the other two pots.  

AFTER: Fairy Moss and Duck Weed installed.   Duckweed is a warm weather plant so it will
only last here for the summer but the fairy moss will freeze over so I may transplant it to
another container for the winter and just leave it outside.  Just don’t throw it in a
stream or lake because it’s invasive.  


Didn’t take long for this cute little guy to arrive


Besides being cute, frogs are very important to our ecosystem...They control populations of
insects (which is why these ponds won’t turn in to a mosquito house)
 and they're also an indicator species, meaning that if their air, water or food source is
 polluted the frogs will develop diseases and abnormalities in their offspring
that let people know something is wrong.

Here’s to you finding inspiration wherever you can...

Tuesday, May 1, 2012

Spring is here! (and so are the weeds!)

Only 30 more wheelbarrows to go!  
Yesterday I picked up another yard of compost from Wittkopf landscape supplies.  I got the Colville Valley Compost which is basically very fine bark that’s been composted for a few years.  Our soil is very heavy clay and it’s going to take years to amend it but that’s all part of gardening…patience!
This is the main reason why we added raised beds for the vegetable garden…so much easier to customize your soil immediately and so far very minimal weeding.

But in the rest of the yard, now that things have started to grow and settle in for a few years, I’m starting to notice that some plants could be bigger/better and I know it’s because of the heavy clay.  Admittedly when we first landscaped I didn’t know much so I really didn’t bother bringing in better garden soil, we just took the tractor out on the back 40, so to speak, and dug up some “nice” dirt.  Hmmmm.  Well, lesson learned.  Now I will be spending the next several years fixing that mistake!  Insert quote here: “There are no gardening mistakes, only experiments” -Phillips.

The only way to improve your soil, what ever type you have, is to add compost yearly, as a mulch, and maybe even dig it in a little bit too.  And of course any new perennials/trees that I plant I dig an extra big hole and add lots of good compost and mix it in with the clay too.  The compost will, over time, amend the soil, making it lighter, not so heavy and compact, which makes for healthier roots systems (and makes weeding easier too!)  Also, in the summer it will keep the moisture in and roots cool.  And because I have clay it will prevent the top of my soil from turning into a concrete driveway!
The other reason to add a good 1-2” layer of mulch around your perennials, trees and shrubs is for weed prevention.  It’s not full proof but it does help.  And much better for the environment than recklessly spraying “weed-b-gone” around your yard…especially when you have pets.  
So for the next week or so I will be hauling compost around the yard in my wheelbarrow, no need to lift weights this week!  
Radishes, Arugula, Spring Onions, Kale that I seeded
about a month ago.
This is my runner bean area this year.  I dug a 2 ft x 2ft
trench along the bottom of the grate and filled
with my homemade compost, then filled back in.  Beans
require very rich, fertile soil.  
This is what happens with chives when you don’t
remove the flowers after they bloom!
after the first set of flowers are done you can cut it all the way down
and you will get a 2nd bloom/crop.